Friday, September 11, 2009

Recycle, Recycle, Recylce!


Again you can see how much recylcing I’ve done. Variety is beautiful. This is just a sample of the amount of wood needed to make these chairs. What you see was used for the back rest. Each back rest uses 18 pieces of wood 7/8 by 7/8 by 20 inches. The seat uses 22 pieces 26 inches long. I imagine I’ve saved over $1000 in wood for the four chairs. I haven’t figured it out yet, but I think you’d be surprised. I work wood, and I’m always surprised at its cost!

More to come.


Là encore, vous pouvez voir combien de recyclage que j'ai fait. La variété, c'est beau. Ceci n'est qu'un échantillon de la quantité de bois nécessaire pour faire ces chaises. Ce que vous voyez a été utilisé pour le dossier. Chaque dosseret utilise 18 morceaux de bois de 7 / 8 par 7 / 8 par 20 pouces. Le siège utilise 22 pièces 26 pouces de long. J'imagine que j'ai économisé plus de 1000 $ en bois pour les quatre chaises. Je n'ai pas trouvé la coût pour le moment, mais je pense que vous seriez surpris. Je travaille le bois, et je suis toujours surpris de son coût! A plutard.

Sample form of seat and backrest


Finding and determining the correct shape for the seat and backrest. Turns out each piece needs to have a 89 degree angle. This technique is called coopering, as seen in wine barrels.
 
Trouver et déterminer la forme correcte pour le siège et le dossier. Se révèle que chaque pièce doit avoir un angle de 89 degrés. Cette technique est appelée la tonnellerie, comme on le voit dans des tonneaux de vin.

kitchen chair underway


The seat after glue up. Still needs to be shaped and sanded.

Le siège après être collé. Doit encore être travailler et sabler.

kitchen chair underway


The back leg in all its glory. Before it gets shaped.
La patte derrière dans toute sa splendeur. Avant qu'elle se prends en forme.


Detail.
Détail.

Mock up of Kitchen Chair (no back rest yet)


Mock up of kitchen chair. I used 2 X 4 pine to save money. It’s easier to shape than hardwood and it allows me the chance to play with dimensions and location. Once the mock up was complete I refined almost every detail in the chair. This was the first time I used a mock up in the design process. Very satisfying.
Échantillon de la chaise de cuisine. J'ai utilisé 2 X 4 pin pour économiser de l'argent. Il est plus facile à travailler qu'un bois dur comme érable, et cela me permet la chance de jouer avec les dimensions et l'emplacement. Une fois l’échantillon est complète j'ai changé presque tous les détails sur la chaise. C'était la première fois que j'ai utilisé une échantillon le processus de conception. Très satisfaisant.

TV stand


The first step is to find all my pieces. Luckily I like to use different species of wood. Instead of buying several boards totalling $400 I look to my pile of off cuts and do my part for the environment. After all, the wood may be smaller, have its imperfections, but it is still functional and beautiful.

La première étape est de trouver toutes mes pièces. Heureusement, je tiens à utiliser des essences de bois différents. Au lieu d'acheter plusieurs planches totalisant 400 $, je regarde dans mon pile de refuse et de fait ma part pour l'environnement. Après tout, le bois peut être plus petits, a ses imperfections, mais il est encore fonctionnel et beau.


Before the top is completed, individual boards are made up with their blocks. Planning and patience are needed to arrive to the finished piece.


Avant que la table est terminé, les blocs sont attacher a leur planches. Planification et de patience sont nécessaires pour arriver à la pièce final.

Detail.


Détail.


The legs tenons fit through the table top. They are wedged into place with wenge.


Les tenons dans les pattes passe à travers le dessus de la table. Elles sont coincée en place avec wengé.

TV stand


Wow! It's been a long time since I last added something. I've been busy, which is good. This piece is built primarily from off cuts destined for the fireplace. Maple, birch, and cherry with a wenge wedge in the tenon of the legs.


Wow! Ca fait un bon bout de temps que je n'ai pas ajouté quelque chose. J'ai été très occupé, ce qui est bon. Cette pièce est construite principalement avec des petits morceaux destinés pour la cheminée. Érable, bouleau, et de cerise avec une cale en wengé dans les tenons des pattes.

Sunday, April 12, 2009

Photo Albums


Two more designs. Fan inlay and compass rose.
The compass rose is meant for weddings. The stars are joined, symbolic of man and women holding hands.
Deux autres modèles. Fan inlay et compass rose.
Le compass rose et destiné pour des mariages. Les étoiles touche, symboliques pour homme et femme qui tient les mains.

Photo Album...Grooved


Grooved photo albums with wenge inlay.
Album de photo rainé avec detail de wengé.

Photo Album...Grooved


Open photo album.

L'album de photo ouvert.

Morris Chair Front View


This is a modern take on a cherry Morris Chair. One of my all time favourite furniture designs.
Il s'agit d'une moderne Chaise Morris en cerisier. Une de mes designs préférées de meubles.

Morris Chair Side View


When I finished school, my first project was to be this Morris Chair. I loved the challenge it was going to give me with all the mortise and tenons. There are 64 of each in the spindles alone. Super comfortable to sit in.
Lorsque j'ai terminé l'école, mon premier projet était ce Chaise Morris. J'ai aimé le défi qu'il allait me donner pour compléter toutes les tenons et mortaises. Il ya 64 de chacun. Super confortable pour s'asseoir dessus.

Magazine Bench


This is meant to be a magazine rack and at the same time can be used as a bench to sit down in front of a mirror.
The box is made from pine.
The legs are mahogany.

Cela est censé être un rack pour des magazines et en même temps peut être utilisé comme un banc pour s'asseoir en face d'un miroir.
La boîte est faite de pin.
Les jambes sont en acajou.

Magazine Bench Detail


Detail of the grooved pine.
Détail de la pin rainée.

Recycled Credenza Detail


The doors are slid open to reveal the two drawers. The marquetry is that of a compass star.

Les portes sont ouvertes pour révéler les deux tiroirs. La marqueterie est celle d'une étoile boussole.

Recycled Credenza Side View


In the side view you can see the different species of wood used. The top and bottom are joined to the sides with dovetails.

Dans la vue de côté, vous pouvez voir les différentes espèces de bois utilisées. Le haut et le bas se rejoignent sur les côtés avec des queues d'aronde.

Recycled Credenza Front View


This is an Arts and Crafts inspired credenza. The casing is a mixture of maple, birch, and cherry. 80% of the casing is left over scraps from other jobs. Instead of heading into the fireplace I took the time to mill and glue them together. I must have saved around $300 in wood.
The doors are curved to a 12 foot radius with book matched walnut veneer.
There are two drawers and two shelves.

C'est un meuble inspiré par le mouvement Arts and Crafts. Le boîtier est un mélange d'érables, de bouleaux et de cerisier. 80% Du meuble était fourni par des scraps des autres jobs. Au lieu de brulé ces morceaux dans la cheminée, j'ai pris le temps de les coller ensemble. Je dois avoir économisé environ 300 $ dans le bois. Les portes sont courbés à un rayon de 12 pieds. Le placage et de noyer. Il ya deux tiroirs et deux tablettes.

Thursday, March 26, 2009


One more picture...I like the distant perspective, the pegs are obviously sticking proud of the bread board end. We see that all joints do not sit flush to one another, this turned out to be a terrific feature.


My two night stands complete with an oil finish. We see the handles are finally in place. I'm very pleased. I would like to tackle a kitchen table in the Greene and Greene style next. We'll see.


Side by side. Lots of detail.


I know it's not obvious, but this is the handle for the drawer. You can see the steps and slight curve in the walnut. The ends are cut off and the handle is sanded to its final shape.

Saturday, March 21, 2009

Protruding finger joints


One of my favourite features. It really feels like knuckles when you rub them. I was a little nervous adding the exposed pegs so close to the edge. I was afraid it would split the wood. Luckily it didn't. I chamfered the pegs considerably to prevent splitting.

Greene and Greene Night Table


Almost done. You can see the keys in the top here. Still missing...the drawer handle.

One of the nicer features found in Greene and Greene furniture...the splined key in table tops.
It is very much a decorative and sensual detail, but it does help in aligning the breadboard end with the bottom of the top.
A breadboard end stabilizes the top from warping. The Greenes knew that the top would move throughout the year and fixed the breadboard in the middle allowing the ends to move. At the same time, as in my example, the top is 17 1/4 wide and the breadboard is 17 1/2 wide allowing for the top to move.
Seeing as the top was glued up in early spring, I need to account for it to swell somewhat this summer. I've done tests before and have seen cherry swell 1/16 of an inch over a 5 inch span in one year.
Note: the keys are glued to the top and not the breadboard allowing them to move with the top.


This is the top in one piece for both night stands. A lot of people hate sapwood. I don't. Sapwood is the lighter colour. Its found towards the outside of the tree. The darker more uniform colour was once sapwood too, but as the tree ages it gets harder and changes to the colour we expect to see. In this case the red in cherry. The sapwood is more like a creamy maple.

This is a glue up of 4 individual boards cut from a 9 inch 8 foot long board. I like to rip all my boards to less than 6 inch so these boards are all roughly 4 1/2 inch wide. Playing with the grain direction I discovered this pattern which looks like the figure 8 pattern.

Greene and Greene Night Table


This is a detail I figured out once the design and construction process was well underway. The sides and back of the stand are cherry veneered mdf.

Following in the Greene brothers example, the mouldings applied to the panels are not the same thickness. The North/South moulding is 1/4 inch thick and the East/West moulding is 3/32 inch creating a nice little jump at the joint. It pulls your hand towards it to feel the lip. Much more enjoyable than if they were flush and even.

Cloud lifts


There are 8 cloud lifts situated under the middle rails. They are attached with the loose tenon and edge glued. Purely decorative. Very much a Greene and Greene staple.

Greene and Greene Night Table


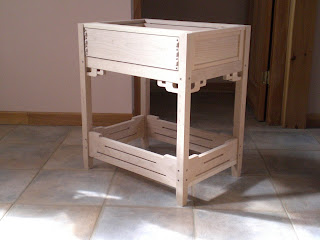
Here's the Greene and Greene nightstand as of last week. The top and handle are missing in this picture.

Thursday, March 19, 2009

Greene and Greene Night Table

I'm almost finished. Within a couple of days I'll start blogging for real and I'll explain how certain details are accomplished. But first I need to iron out the kinks.